
HP G56 and G62 Laptop Screen Replacement
You have dropped your HP G56 or HP G62 laptop and the screen is cracked and showing lines? In this tutorial you will learn how to disassemble and replace that broken LCD screen. The HP G56 and G62 notebooks come with 15.6 inch LED LCD widescreens. This screen replacement guide will show you step by step how to replace a HP defective screen.
CLICK HERE TO FIND THE HP G56 AND G62 LAPTOP SCREENS
LOOK AT THE WHOLE INSTRUCTION FIRST BEFORE STARTING. You considering laptop screen repair service if you feel unconfortable doing it yourself.
This replacement will be done with screens from Laptop Screen Online.
 |
| HP G56 Laptop With Broken Screen |
For specific screen types check the screens at the links below;
HP G56 Replacement Screen
HP G62 Replacement Screen
Find others at the Laptop Screen Online.
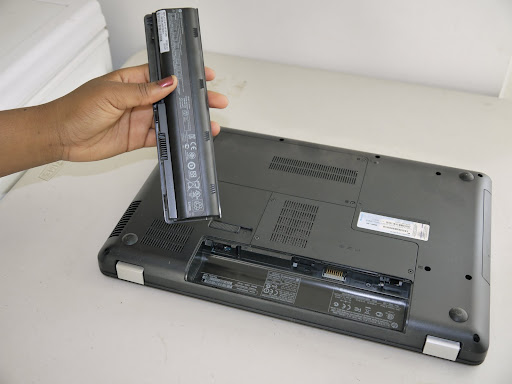 |
| HP Battery Removed |
Make sure you remove the HP laptop battery before starting the replacement. Removing the battery is essential as failure to do so may cause the laptop backlight or any other part to malfunction after the replacement.
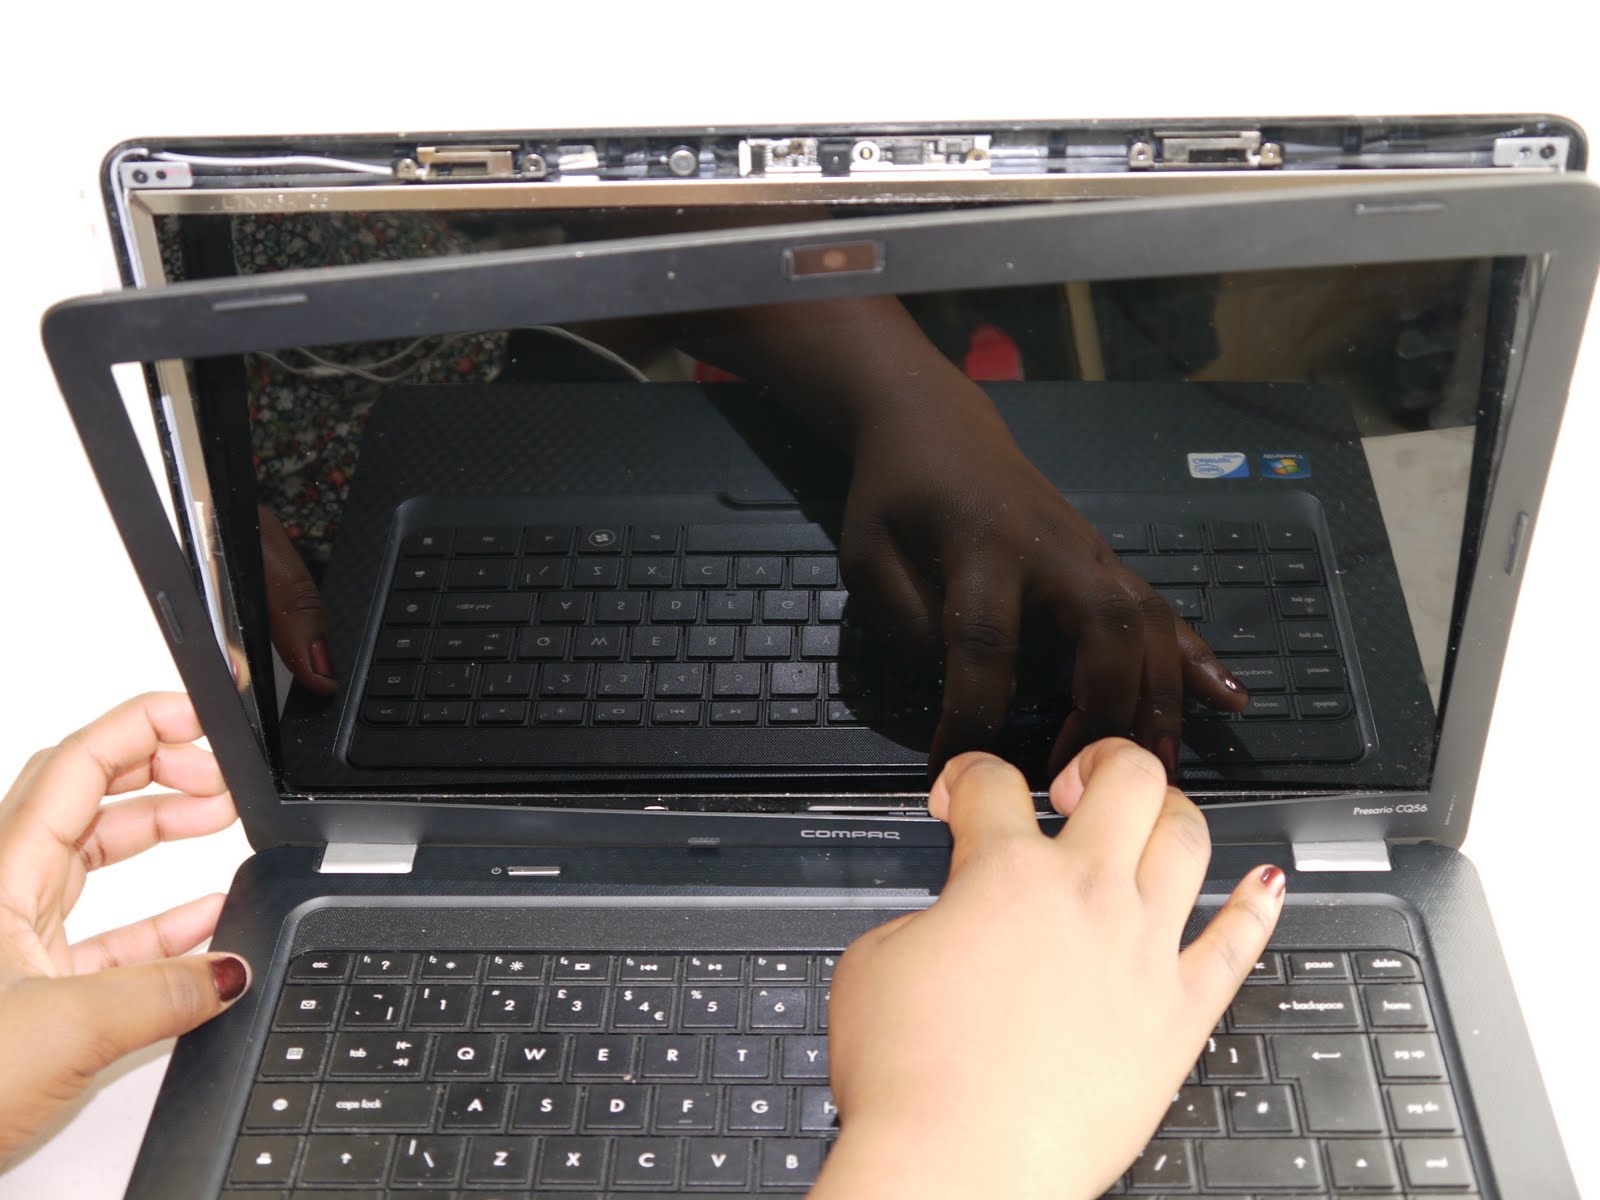 |
| Remove Hp Screen Bezel |
put your fingers between the HP laptop screen and the plastic bezel and start pulling on all sides. The HP G56 and G62 do not come with screws in the bezel. Pull on all sides until the bezel releases. Note that we are replacing the screen without totally removing the bezel. This is the fasted way to change the screen. There are other slower and harder way which will require you to dismantle the whole laptop.

Remove the two screws on the top sides of the screen as in the picture.
Removing the top screws will free the screen. Pull the screen towards you and remove all side screws.

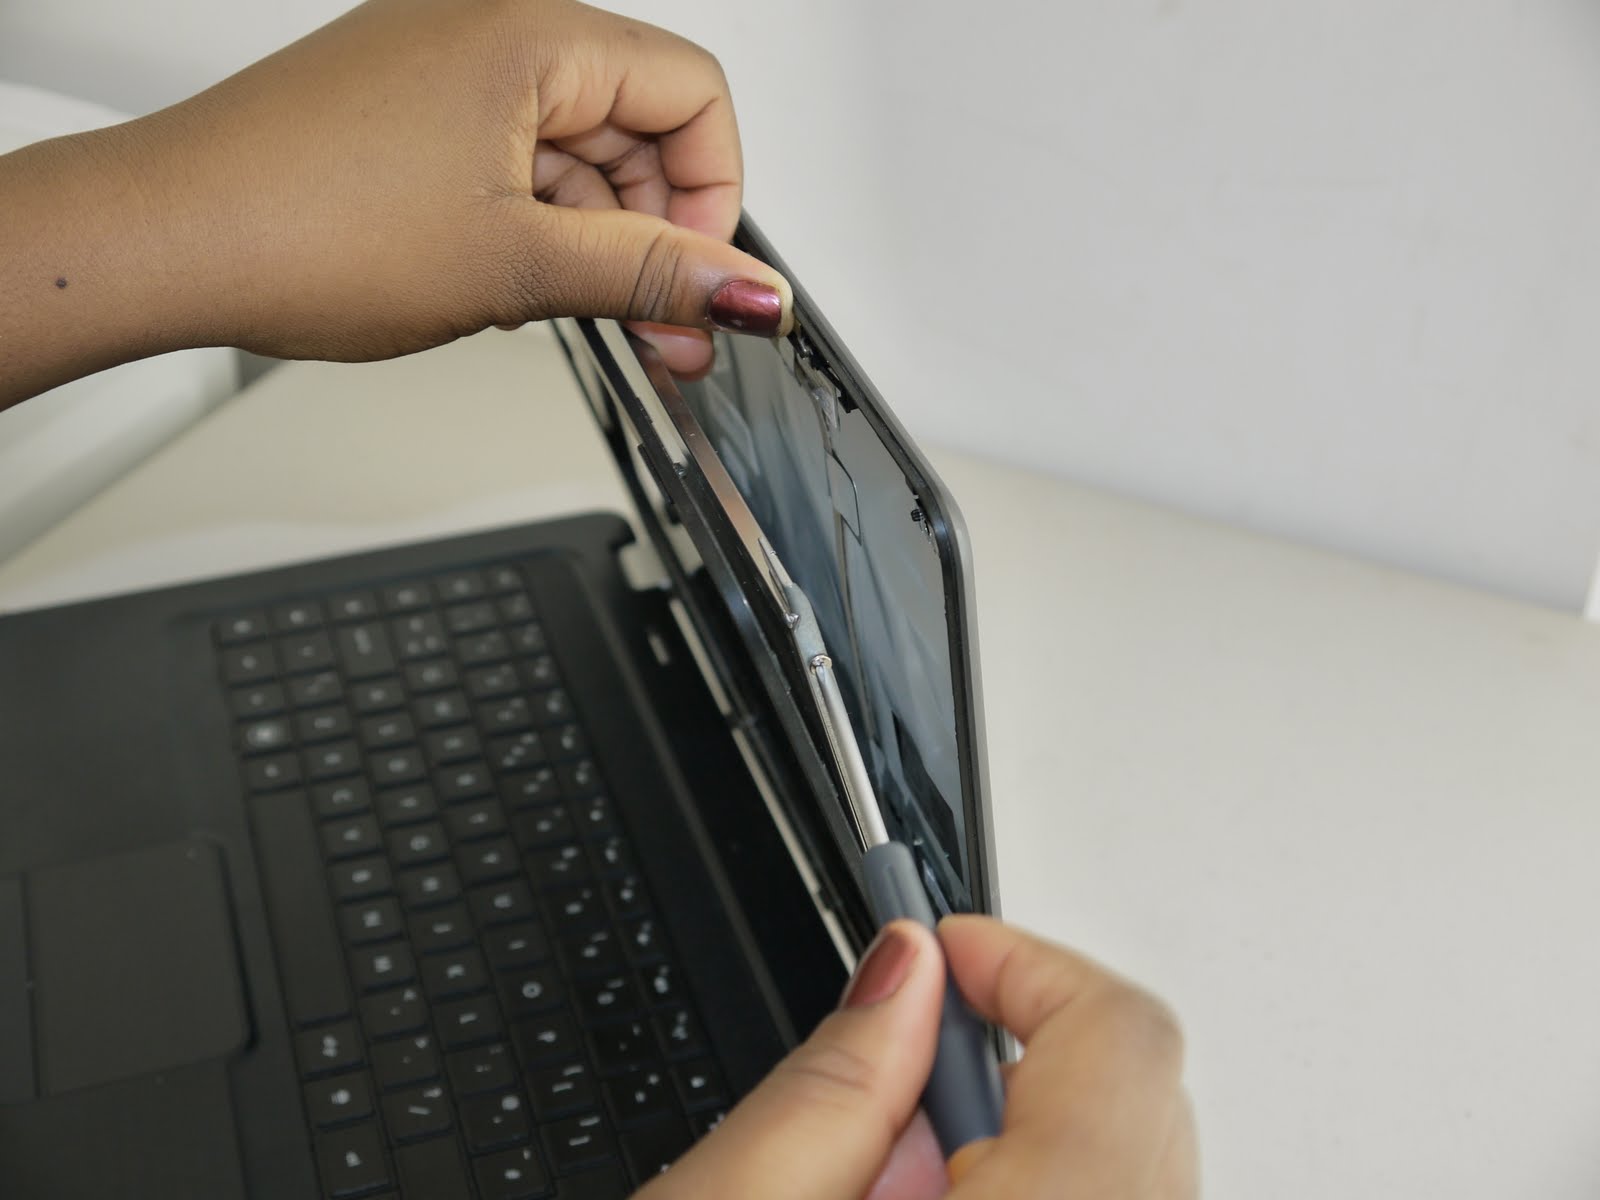
The lower sidescrew may prove a little difficult to remove. The trick is to put an object at the back of the screen as shown in the image pull the plastic bezel towards you a little. NOTE THAT PULLING TOO MUCH WILL SNAP THE BEZEL.

In the middle of the laptop at the hinges area you will find the screen cable. The trick is to free this cables so that they do not snap during the removal of the screen. The cable will be held in the platic hold of the laptop in the hinges area. REMEMBER TO PUT THE CABLE BACK IN PLACE WHEN INSTALLING A NEW SCREEN.

Next is to take the screen out through the side of the laptop. REMEMBER TO HAVE A DROPPING. This means that the laptop should be place at the edge of the table while removing the screen. Also NOTE THAT THE CABLE IS STILL ATTACHED so do this carefully.
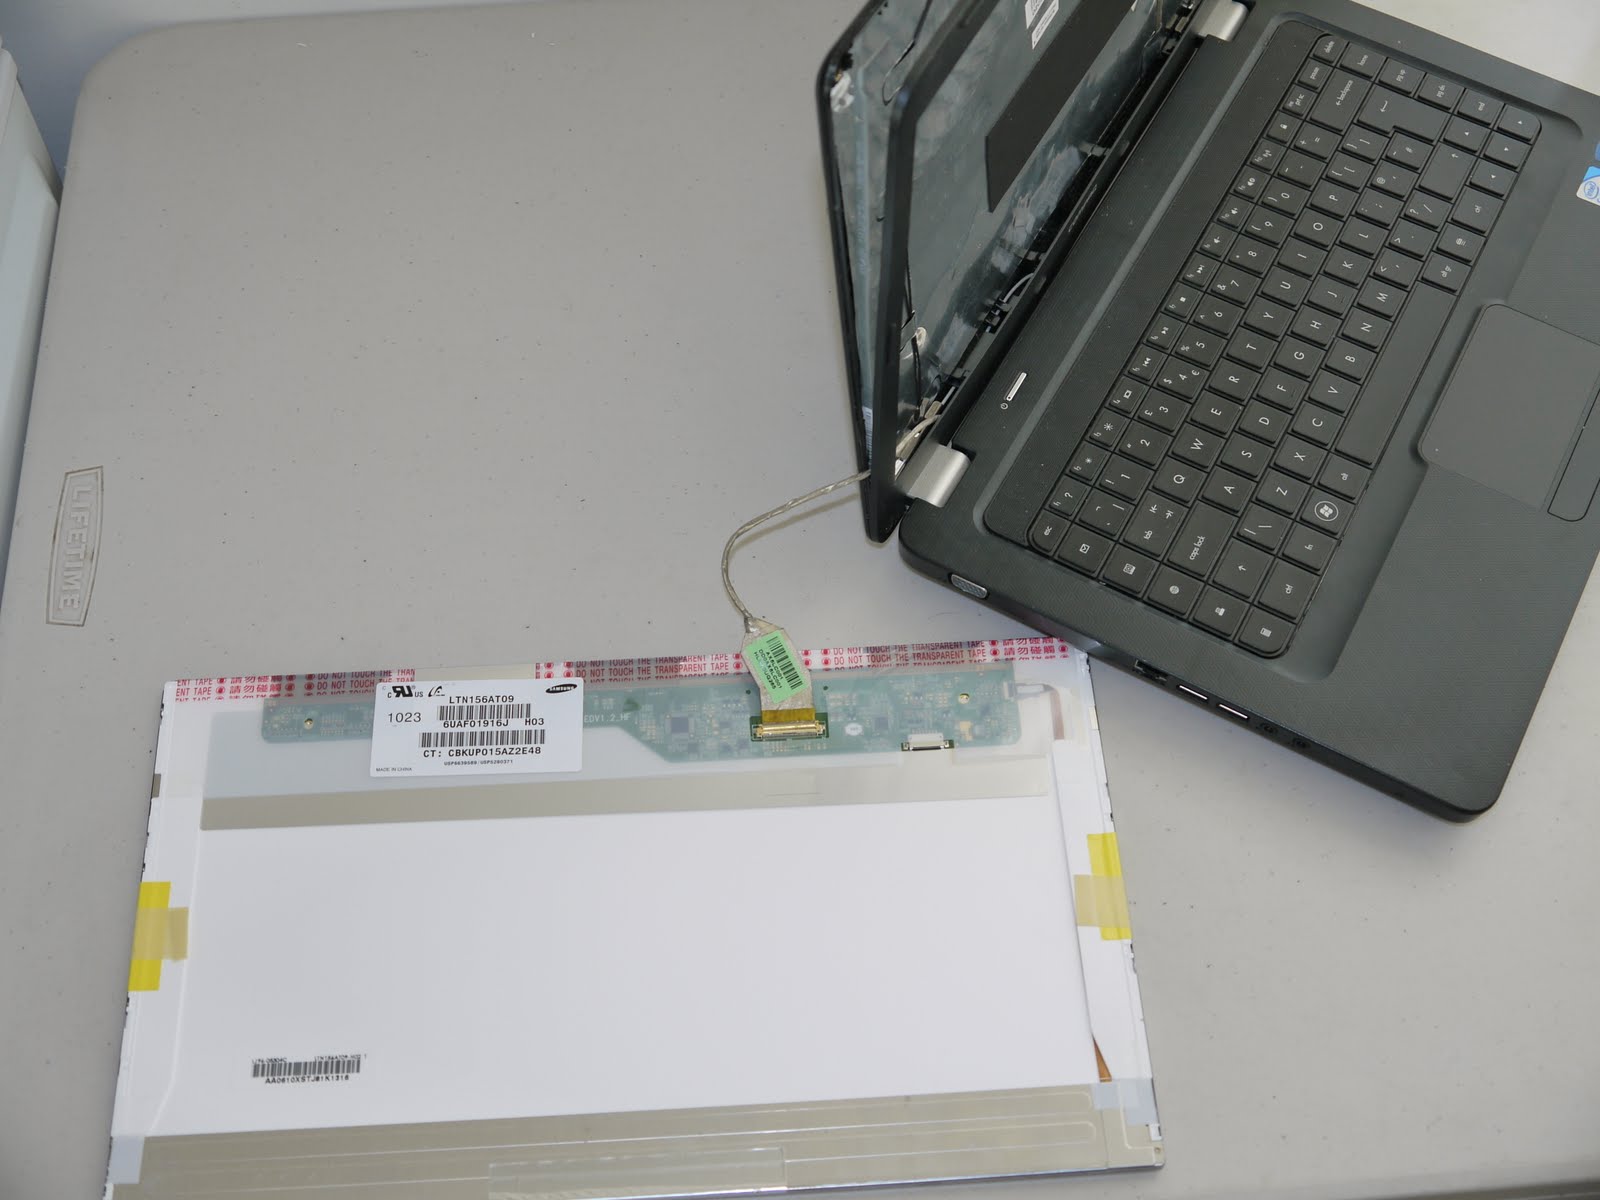
Place the screen on the table and at this point you will see the screen type you need. The HP G56 and G62 comes with 15.6 LED TFT LCD screen with resolution of 1366 x 768. On the back of the screen you will find the screen part number. The one in the image is made by Samsung and with part number LTN156AT09. There are other makes that can be used as a replacement including LP156WH2 made by LG, B156XW02 V.2 made by AUO, BT156GW01 V.4 made by INNOLUX or N156B6-L06 made by Chi Mei.

Next is to peel the cable clear tape first before disconnecting the cable from the back of the screen. some people make the mistake of attempting to disconnect the cable whilst the clear tape is still there. This may totally damage the ribbon cable and its connector.
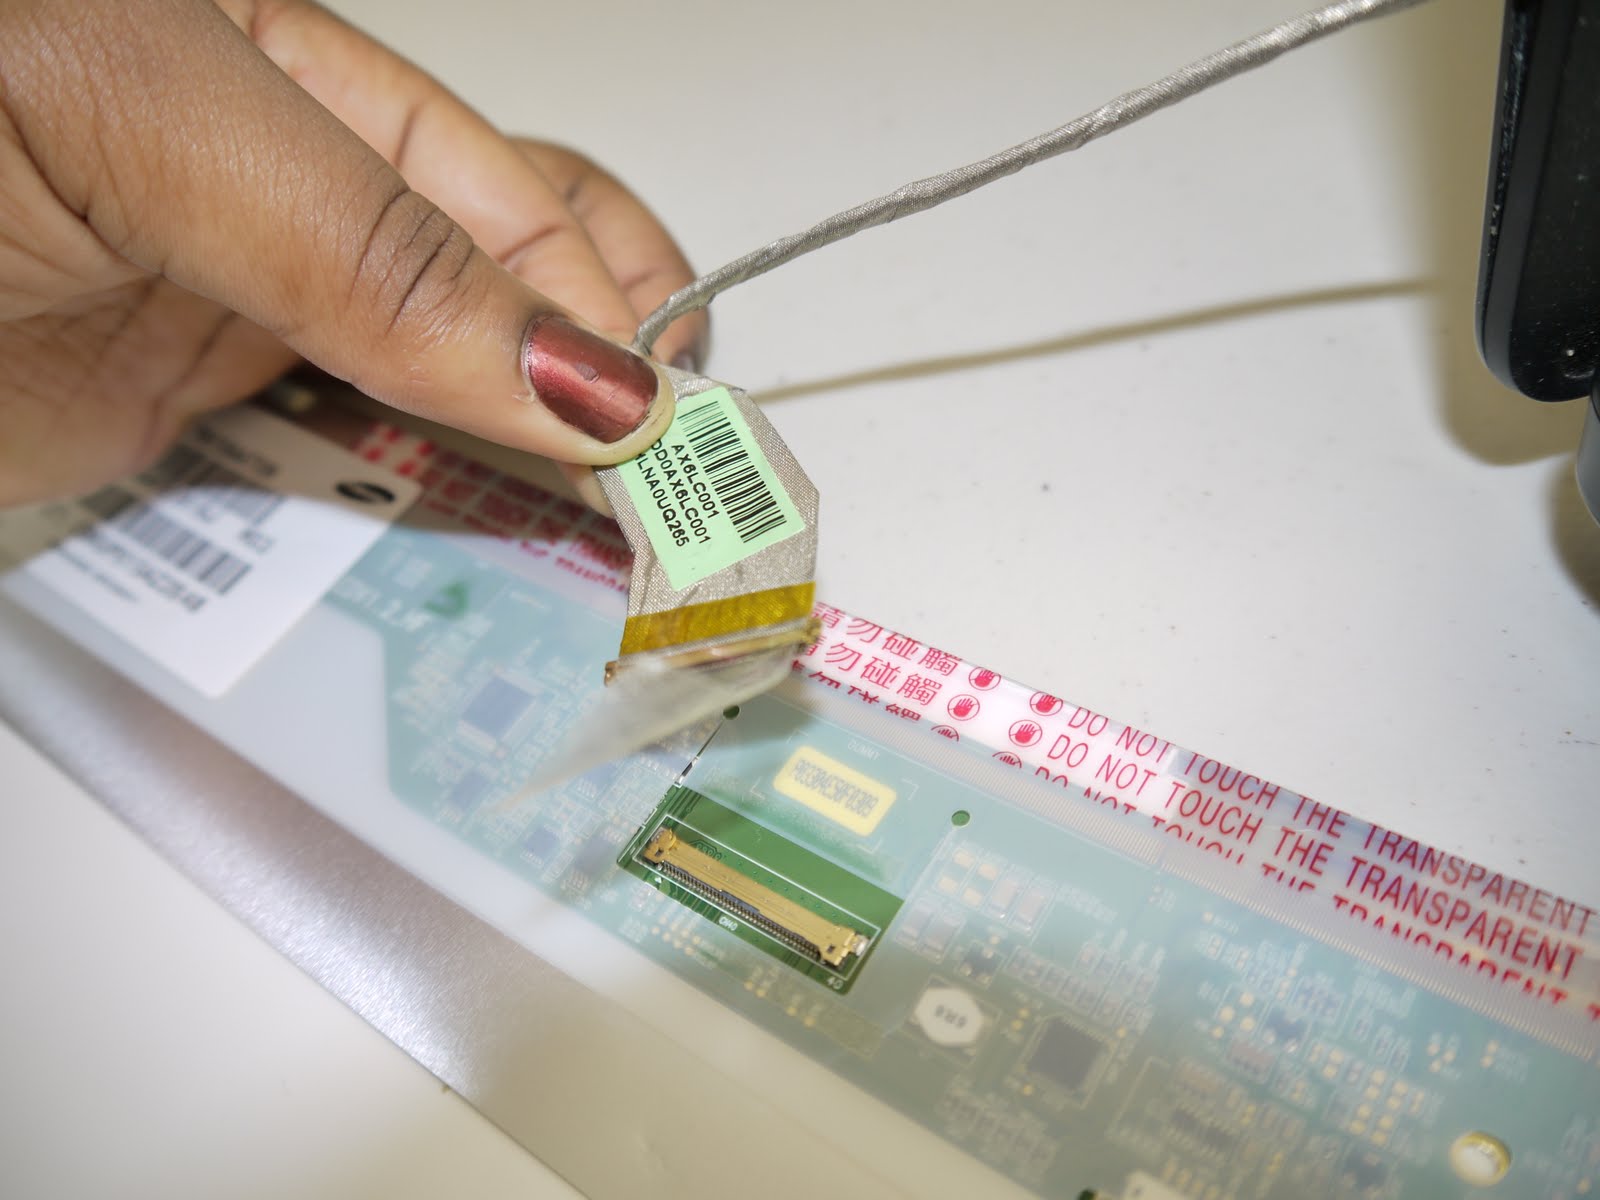
After peeling up the clear tape it is then safe to disconnect the cable.
After all this you would have successfully removed the broken screen from the HP laptop. To install a new one simply carry out the process in reverse.

Always order the right screen for you HP G62 screen and HP G56 laptop screen for your notebook. All models in stock Laptop Screen Online;

Leave a comment